- Published on
Passwordless email authentication with Next.js using NextAuth.js
- Authors

- Name
- Andreas Keller
- @itsakeller
NextAuth.js is an extremly well done authentication library for Next.js apps with built in support for many popular services (Google, Facebook, Auth0, ...) and passwordless Email signin which we will setup in this article.
We will be building a Next.js app with a protected members area using NextAuth.js with passwordless email authentication and MongoDB to store the user accounts. For sending Email we will set up Mailtrap.io.
Setting up MongoDB
We create a MongoDB database on MongoDB Atlas following these instructions.
Create new Next.js app with MongoDB
We create our app based on the with-mongodb starter:
npx create-next-app --example with-mongodb nextjs-mongodb
# or
yarn create next-app --example with-mongodb nextjs-mongodb
We then copy the .env.local.example file to .env.local and need to provide the two environment variables MONGODB_URI and MONGODB_DB with our info from the previous step.
If we are successfull we should see You are connected to MongoDB after starting our app and opening http://localhost:3000 in our browser.
Add next-auth as a dependency
Next we need to install next-auth.
yarn add next-auth
After installing next-auth we need to create the file api/auth/[...nextauth].js inside our pages folder. NextAuth.js uses a Next.js catch-all-route for its endpoints.
In this file all the configuration for NextAuth.js is setup.
We want to use NextAuth.js with passwordless authentication, so we setup its Email provider:
import NextAuth from "next-auth";
import Providers from "next-auth/providers";

const options = {
  database: process.env.MONGODB_URI,
  providers: [
    Providers.Email({
      server: {
        host: process.env.EMAIL_SERVER_HOST,
        port: process.env.EMAIL_SERVER_PORT,
        auth: {
          user: process.env.EMAIL_SERVER_USER,
          pass: process.env.EMAIL_SERVER_PASSWORD,
        },
      },
      from: process.env.EMAIL_FROM,
    }),
  ]
};

export default (req, res) => NextAuth(req, res, options);
As you can see from the configuration we need to set a couple environment variables. For our production app we will need an email service like Postmark or SendGrid to send our emails. But a great option for our development environment is Mailtrap, an email sandbox service. Sign up and get yourself a demo inbox. Then copy the credentials into .env.local.
EMAIL_FROM=info@andreaskeller.name
EMAIL_SERVER_HOST=
EMAIL_SERVER_PORT=
EMAIL_SERVER_USER=
EMAIL_SERVER_PASSWORD=
For NextAuth.js to work properly we need to create a custom _app.js.
import { Provider } from "next-auth/client";

function MyApp({ Component, pageProps }) {
  return (
    <Provider session={pageProps.session}>
      <Component {...pageProps} />
    </Provider>
  );
}

export default MyApp;
You need to configure a database for the Email provider. We pass our MONGODB_URI connection string to the databaseconfiguration option.
Lastly NextAuth.js needs another environment variables. Add NEXTAUTH_URL=http://localhost:3000 to .env.local.
MongoDB peerOptionalDependencies issue
You might need to add peerOptionalDependencies to your package.json file if you experience issues. See NextAuth.js issue 552 for more info.
  "peerOptionalDependencies": {
    "mongodb": "^3.5.9"
  }
Testing authentication flow
With this setup we can already test our passwordless authentication flow. Open localhost:3000/api/auth/signin to get started.
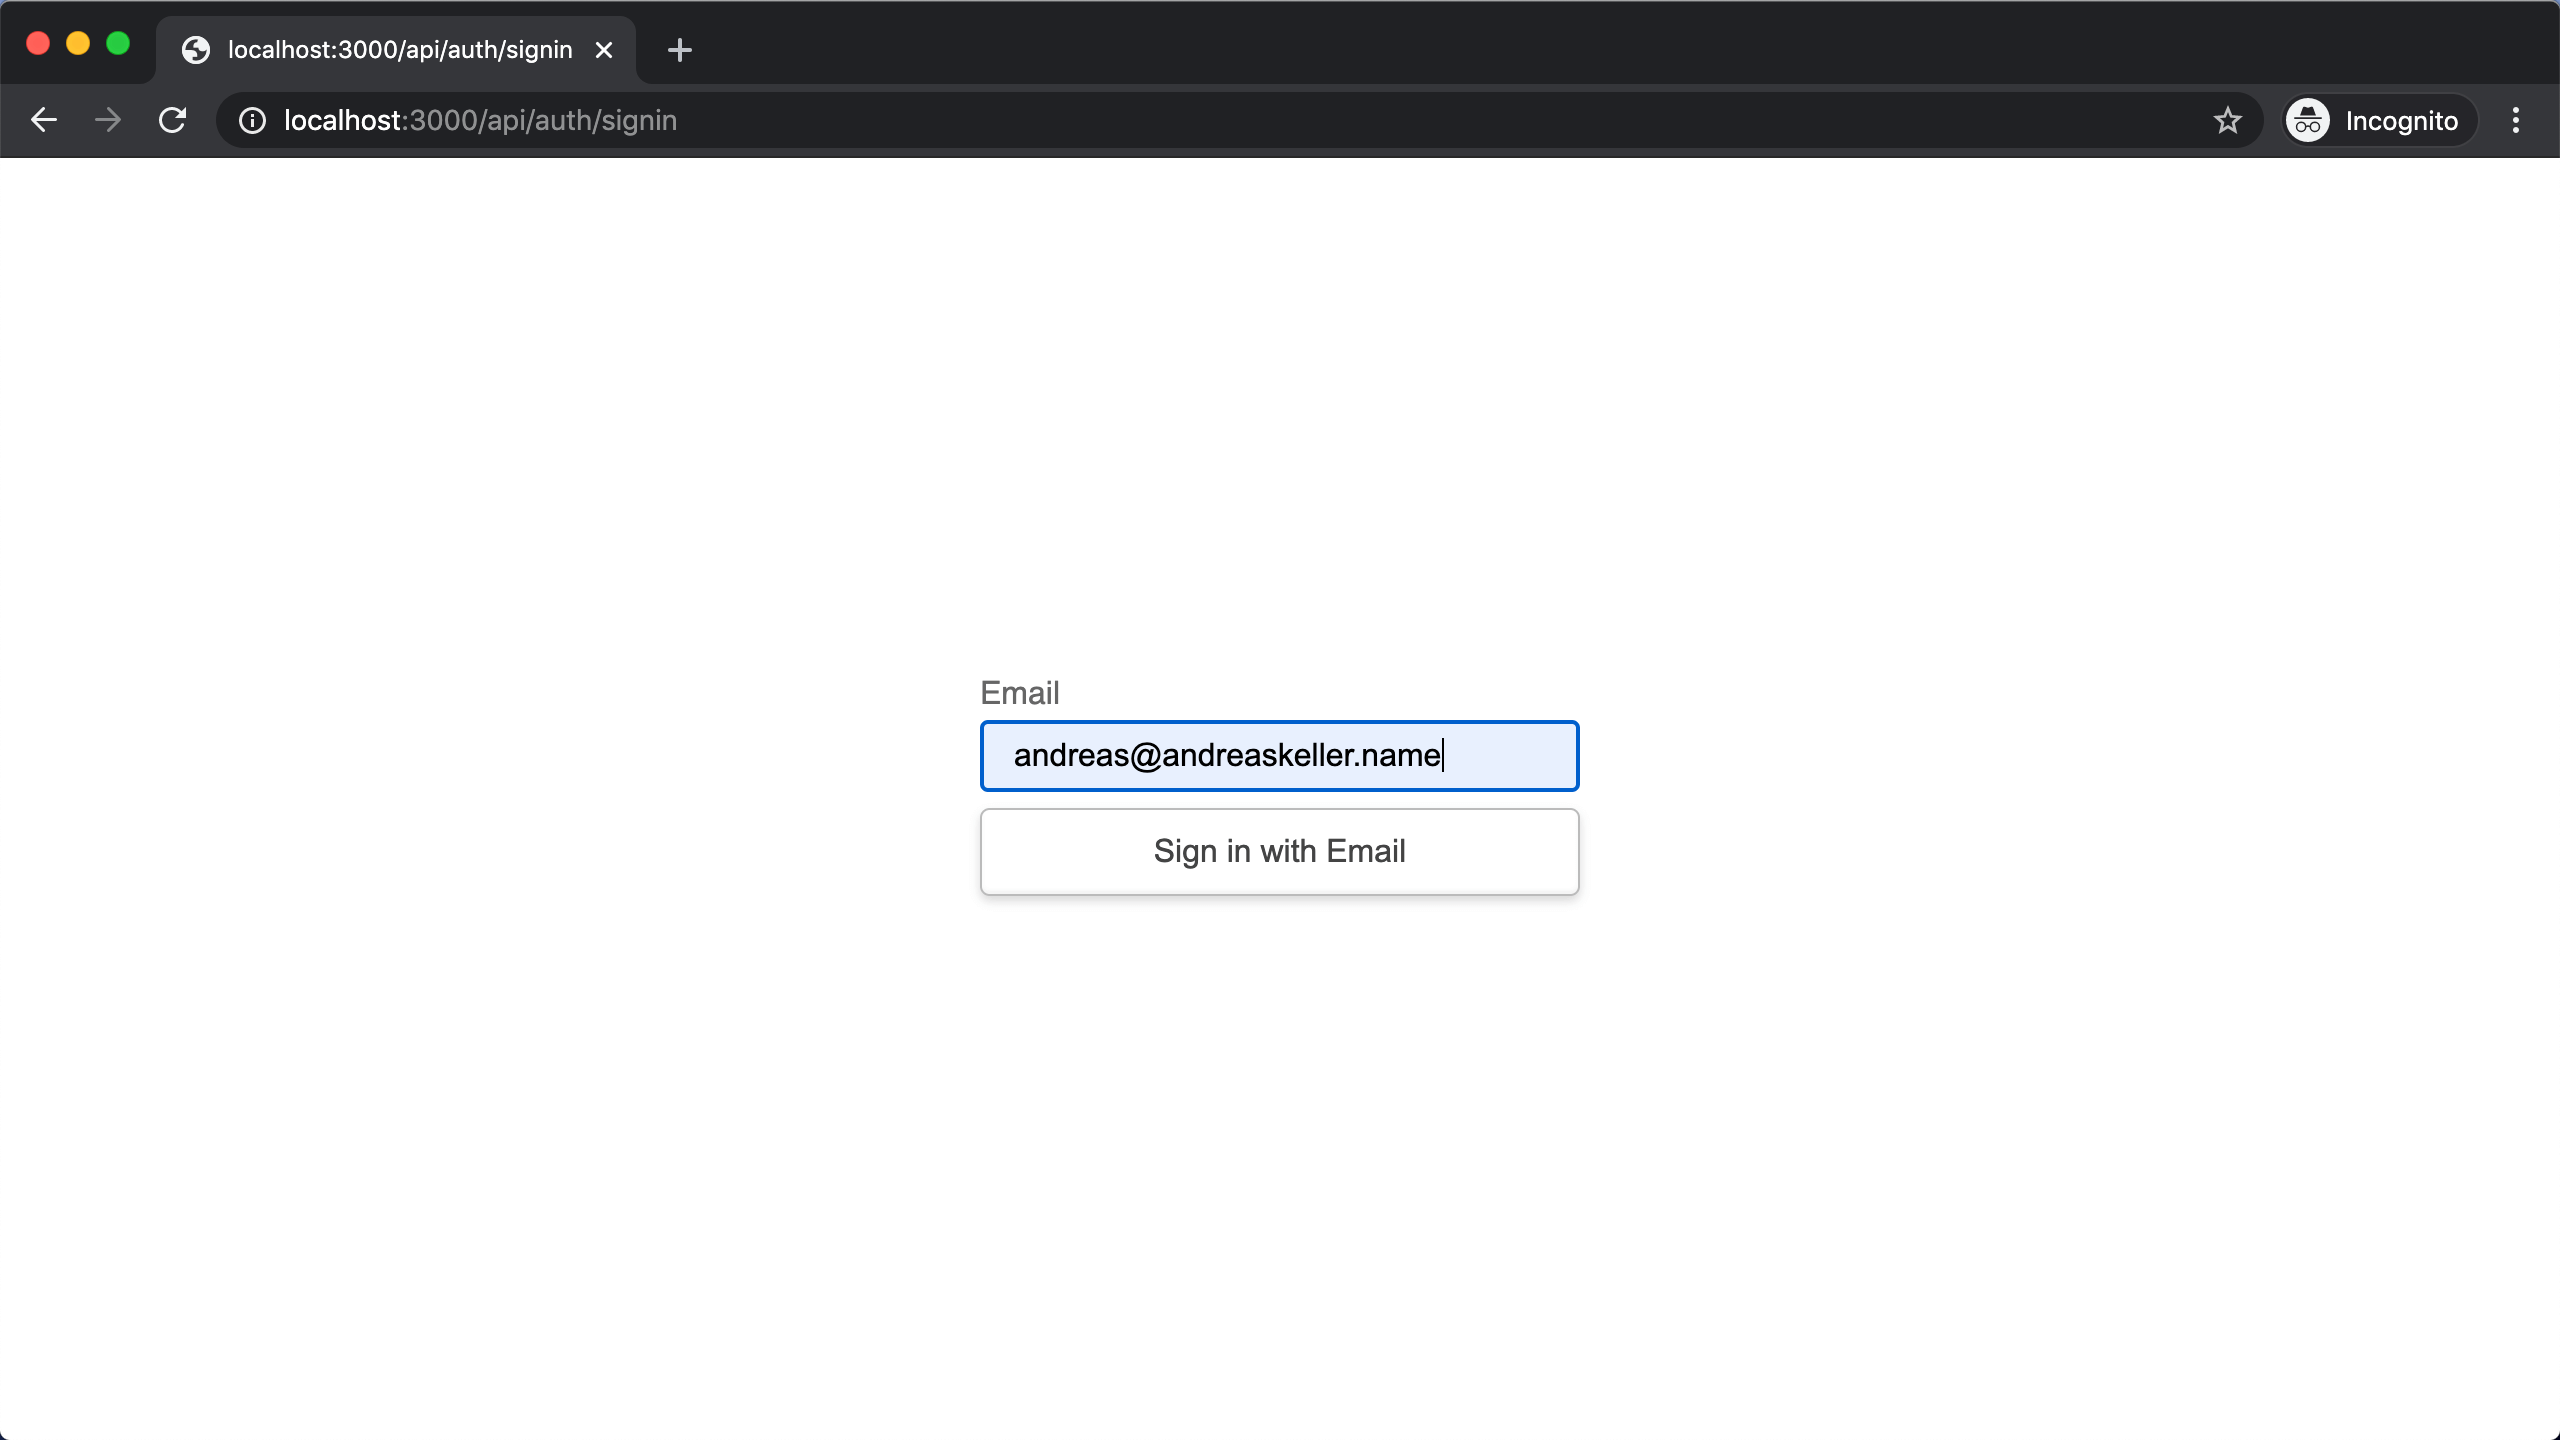
After entering your email and submitting the form you should get a confirmation that a sign in link has been sent to your email address.
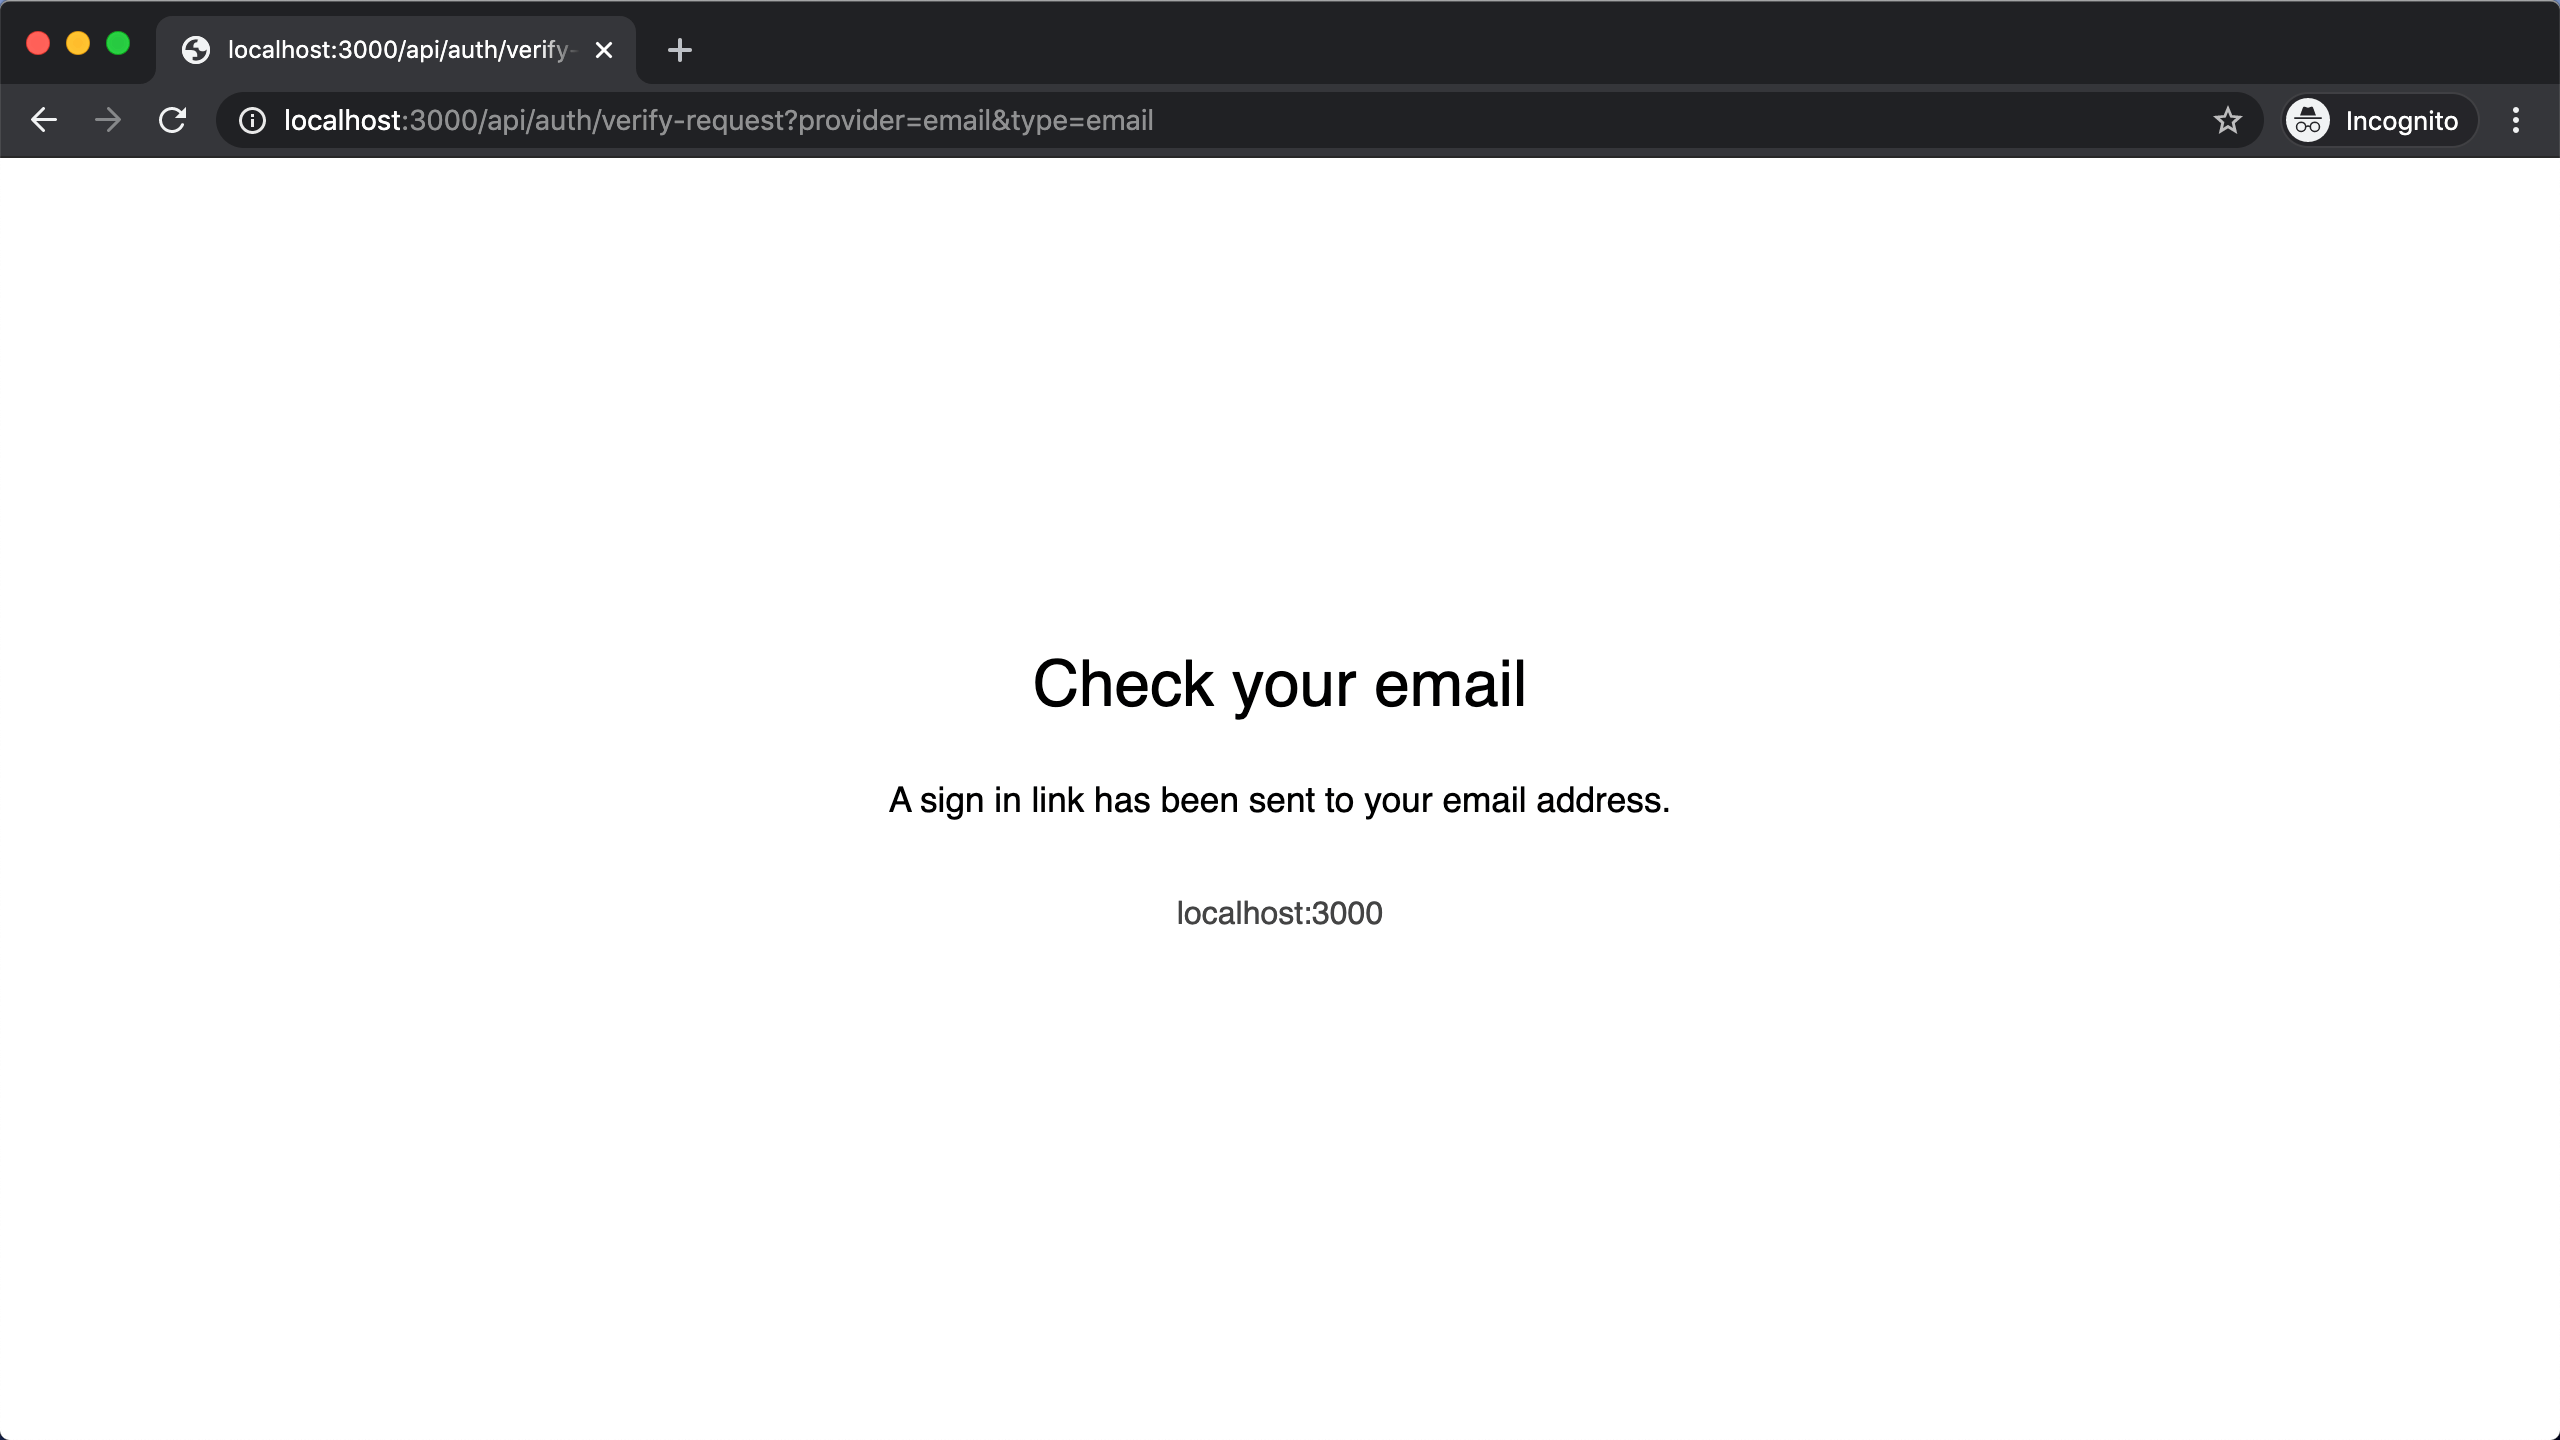
Go to your inbox (in our case Mailtrap inbox) and click the link in the email.
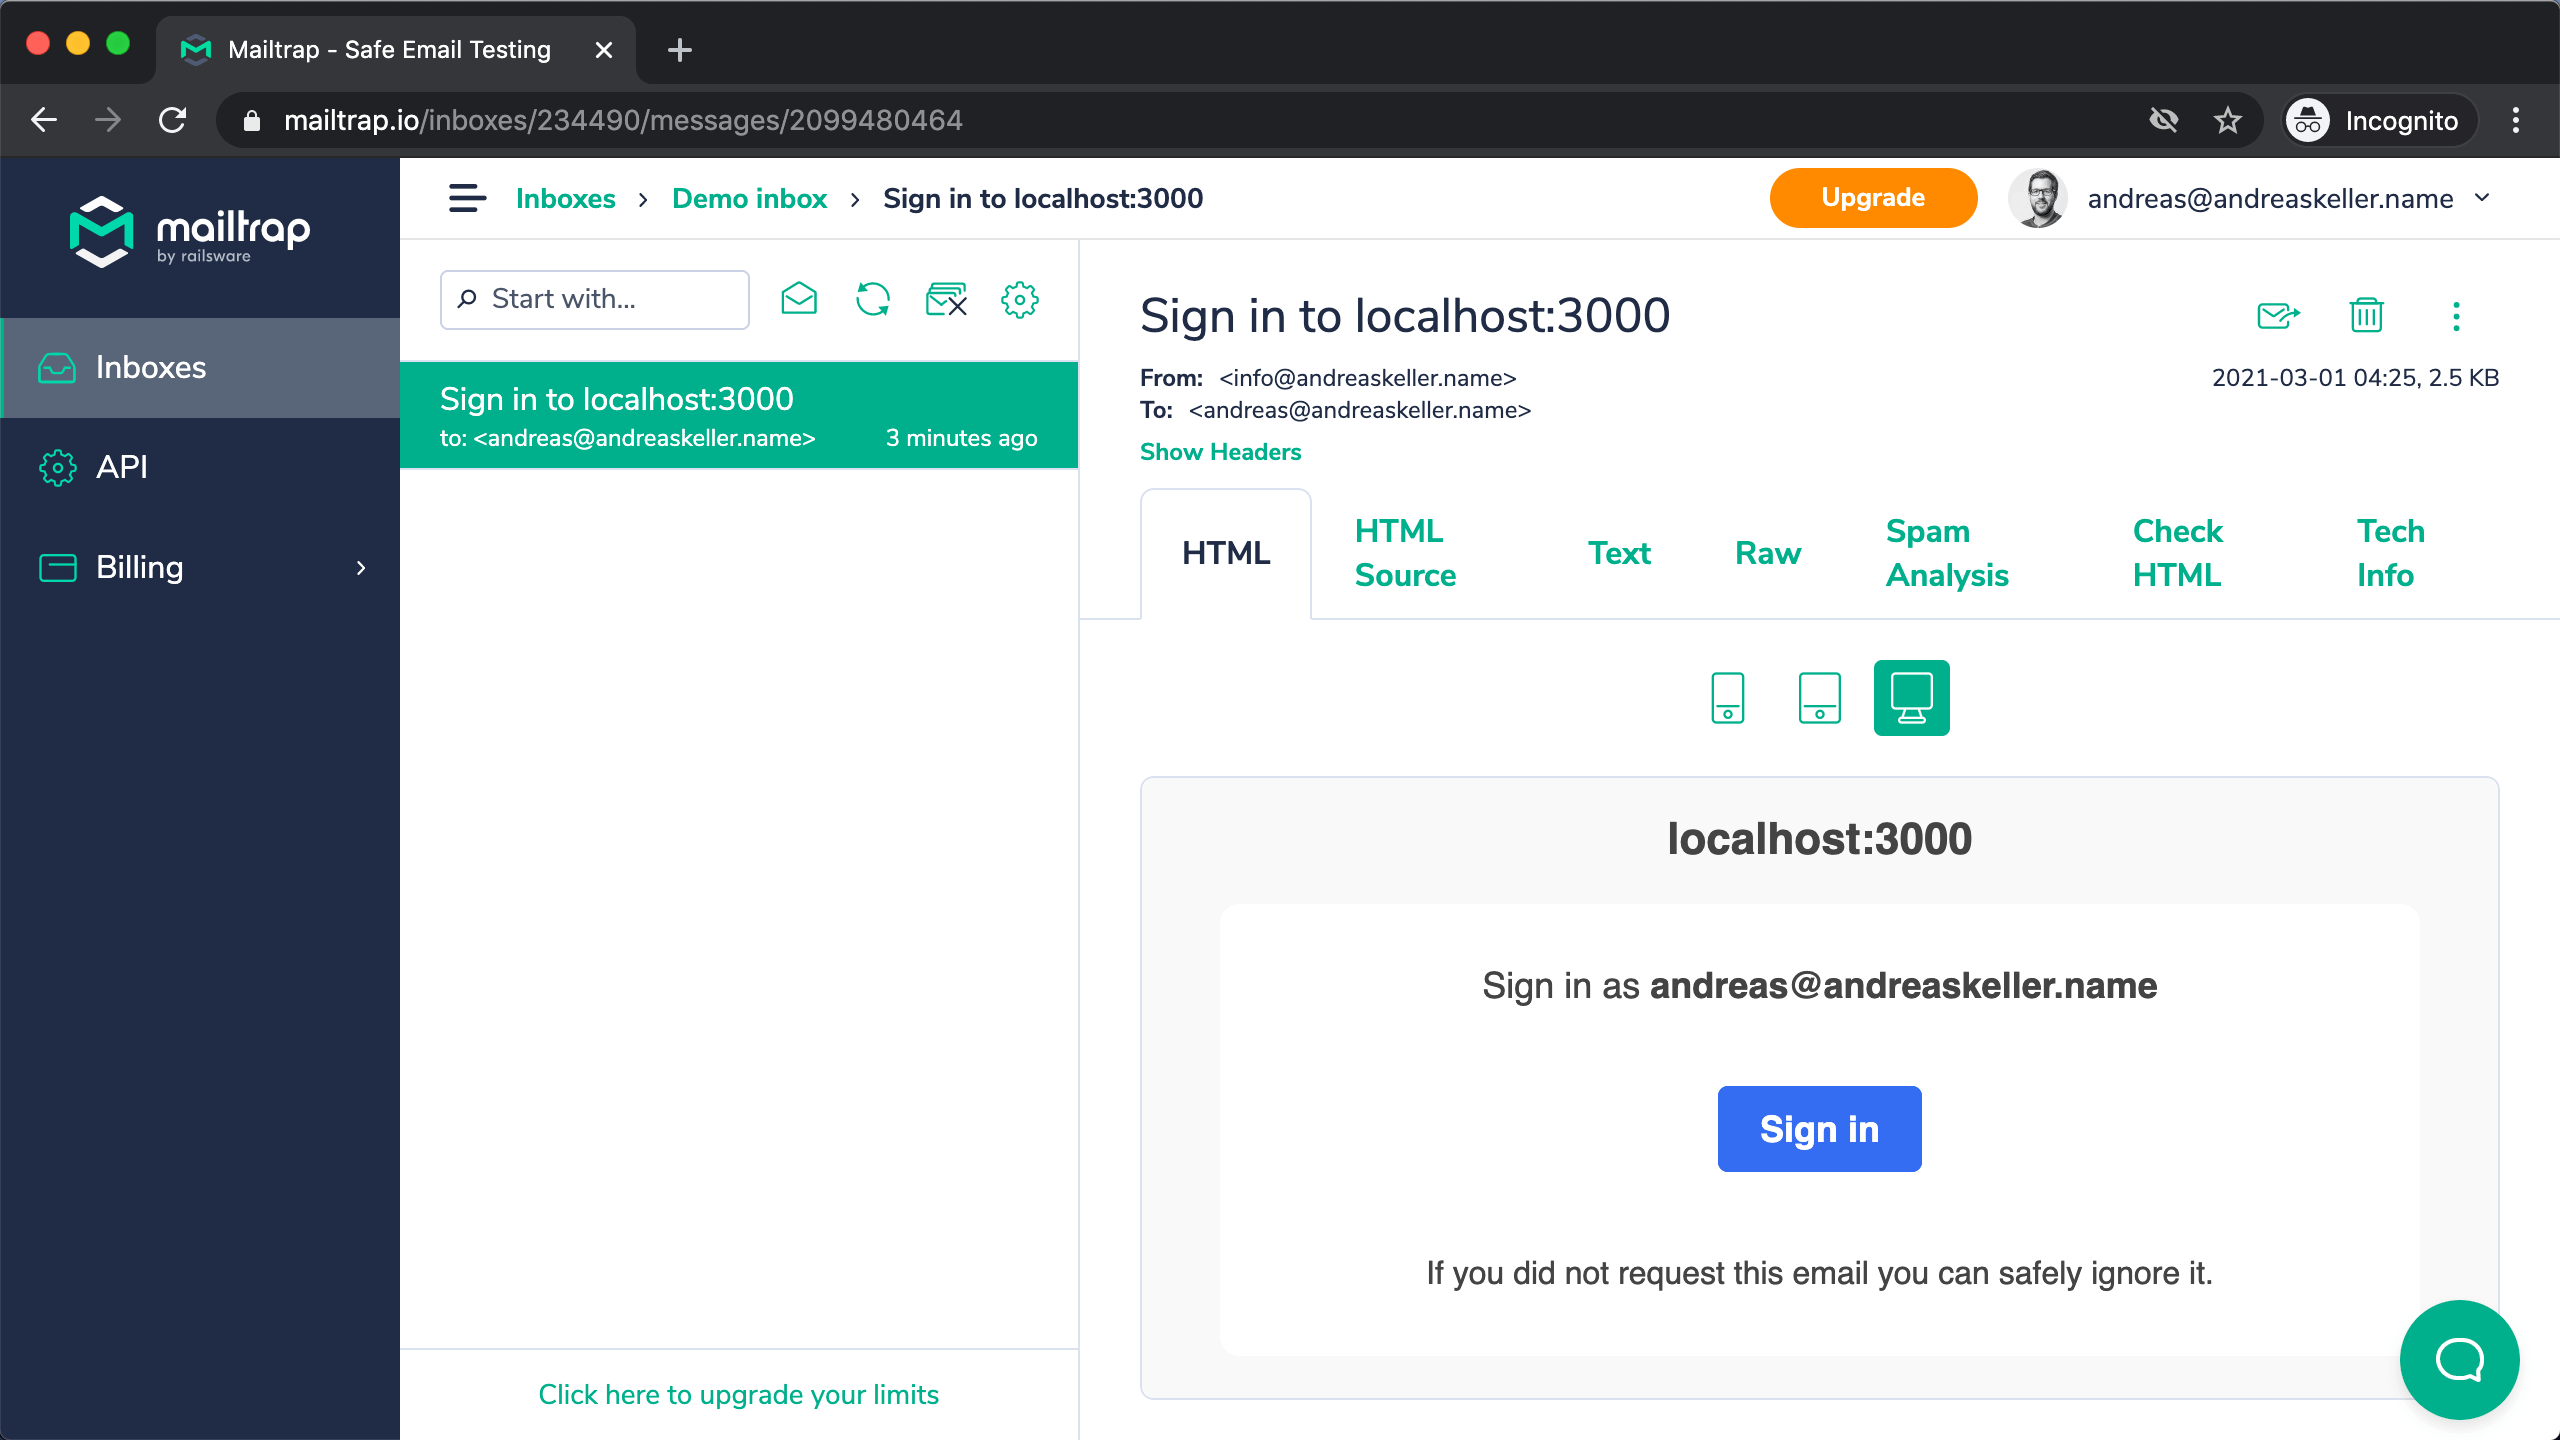
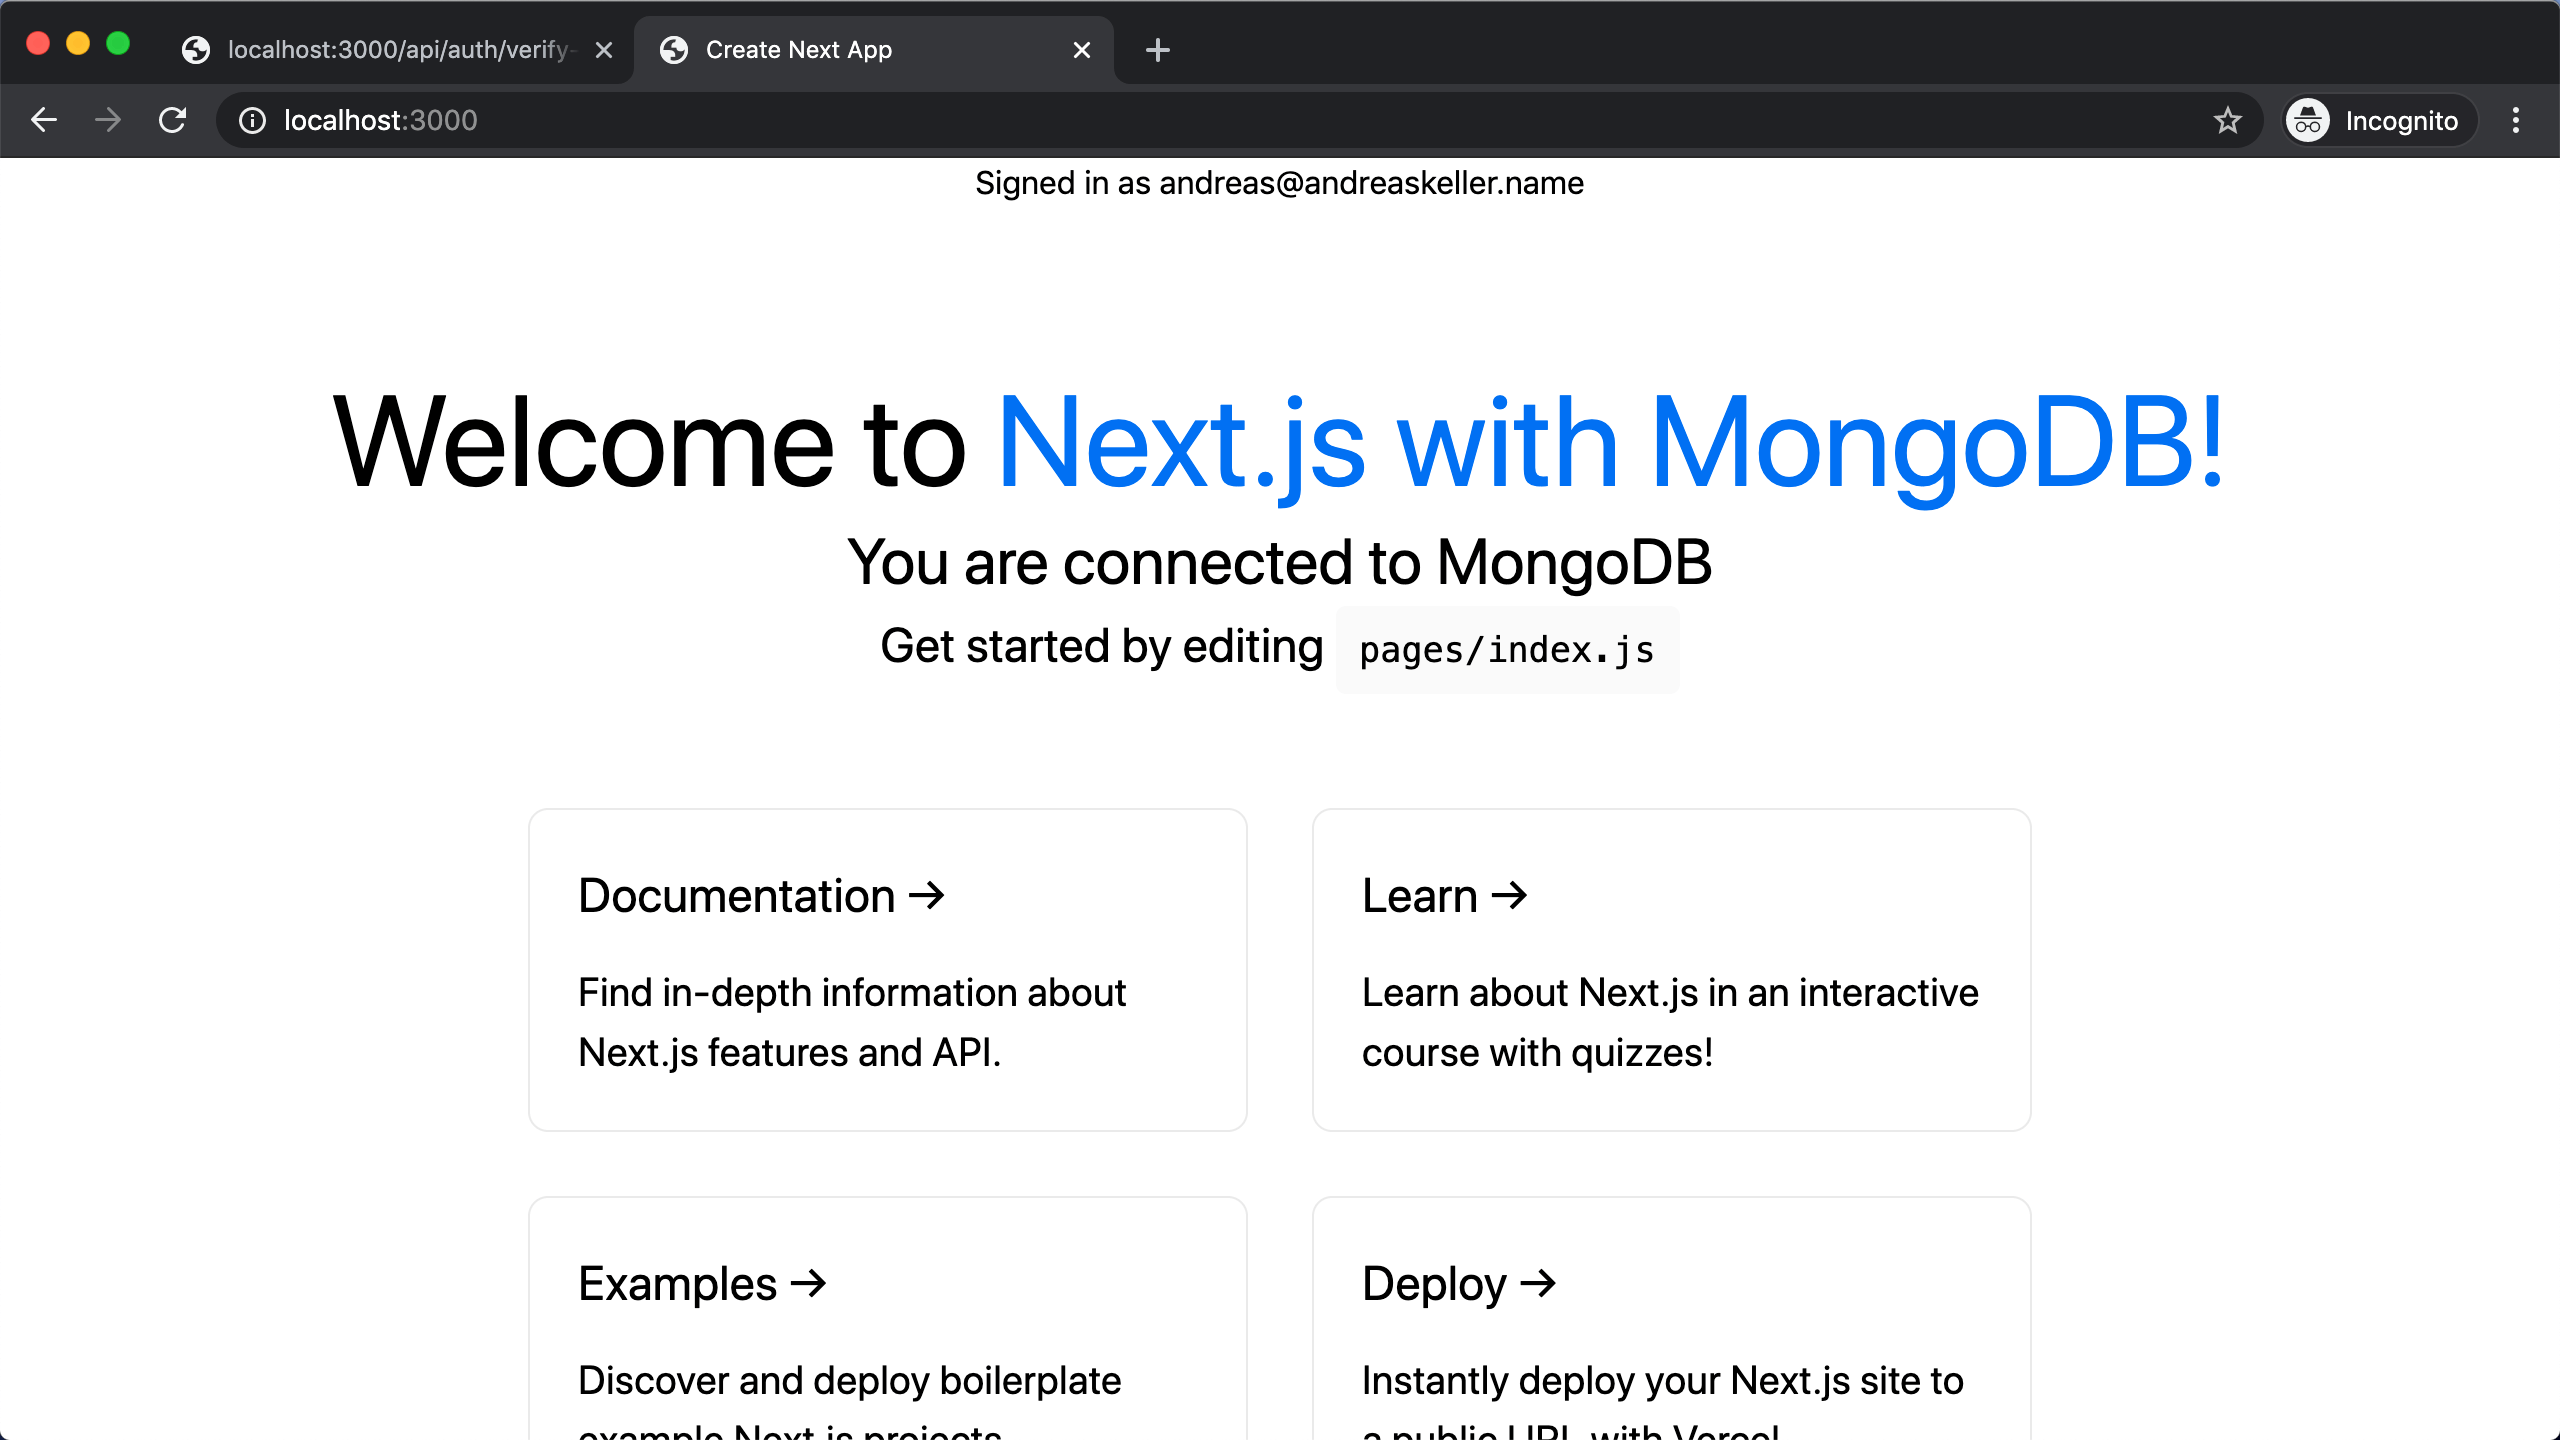
After clicking Sign in you should be redirected to localhost:3000. Next step is verifying that we are actually signed in.
Verifying user is signed in
The useSession() React Hook in the NextAuth.js client is the easiest way to check if someone is signed in.
In our pages/index.js we import the useSession() hook and invoke it to get the current session.
...
import { useSession } from "next-auth/client";

export default function Home({ isConnected }) {
  const [session, loading] = useSession();

  return (
    <div className="container">
      <Head>
        <title>Create Next App</title>
        <link rel="icon" href="/favicon.ico" />
      </Head>

      {session && (
        <>
          <p>Signed in as {session.user.email}</p>
        </>
      )}
      {!session && (
        <p>
          <a href="/api/auth/signin">Sign in</a>
        </p>
      )}
...
After signing in we should see our email address at the top of the page.
Customizing sign in page
NextAuth.js automatically creates simple, unbranded authentication pages for handling Sign in, Sign out, Email Verification and displaying error messages.
The options displayed on the sign up page are automatically generated based on the providers specified in the options passed to NextAuth.js.
To add a custom sign in page, we can use the pages option:
...
  pages: {
    signIn: "/signin",
  }
...
Adding TailwindCSS
To style our custom sign in page we use TailwindCSS. They have a great guide on how to install TailwindCSS with Next.js.
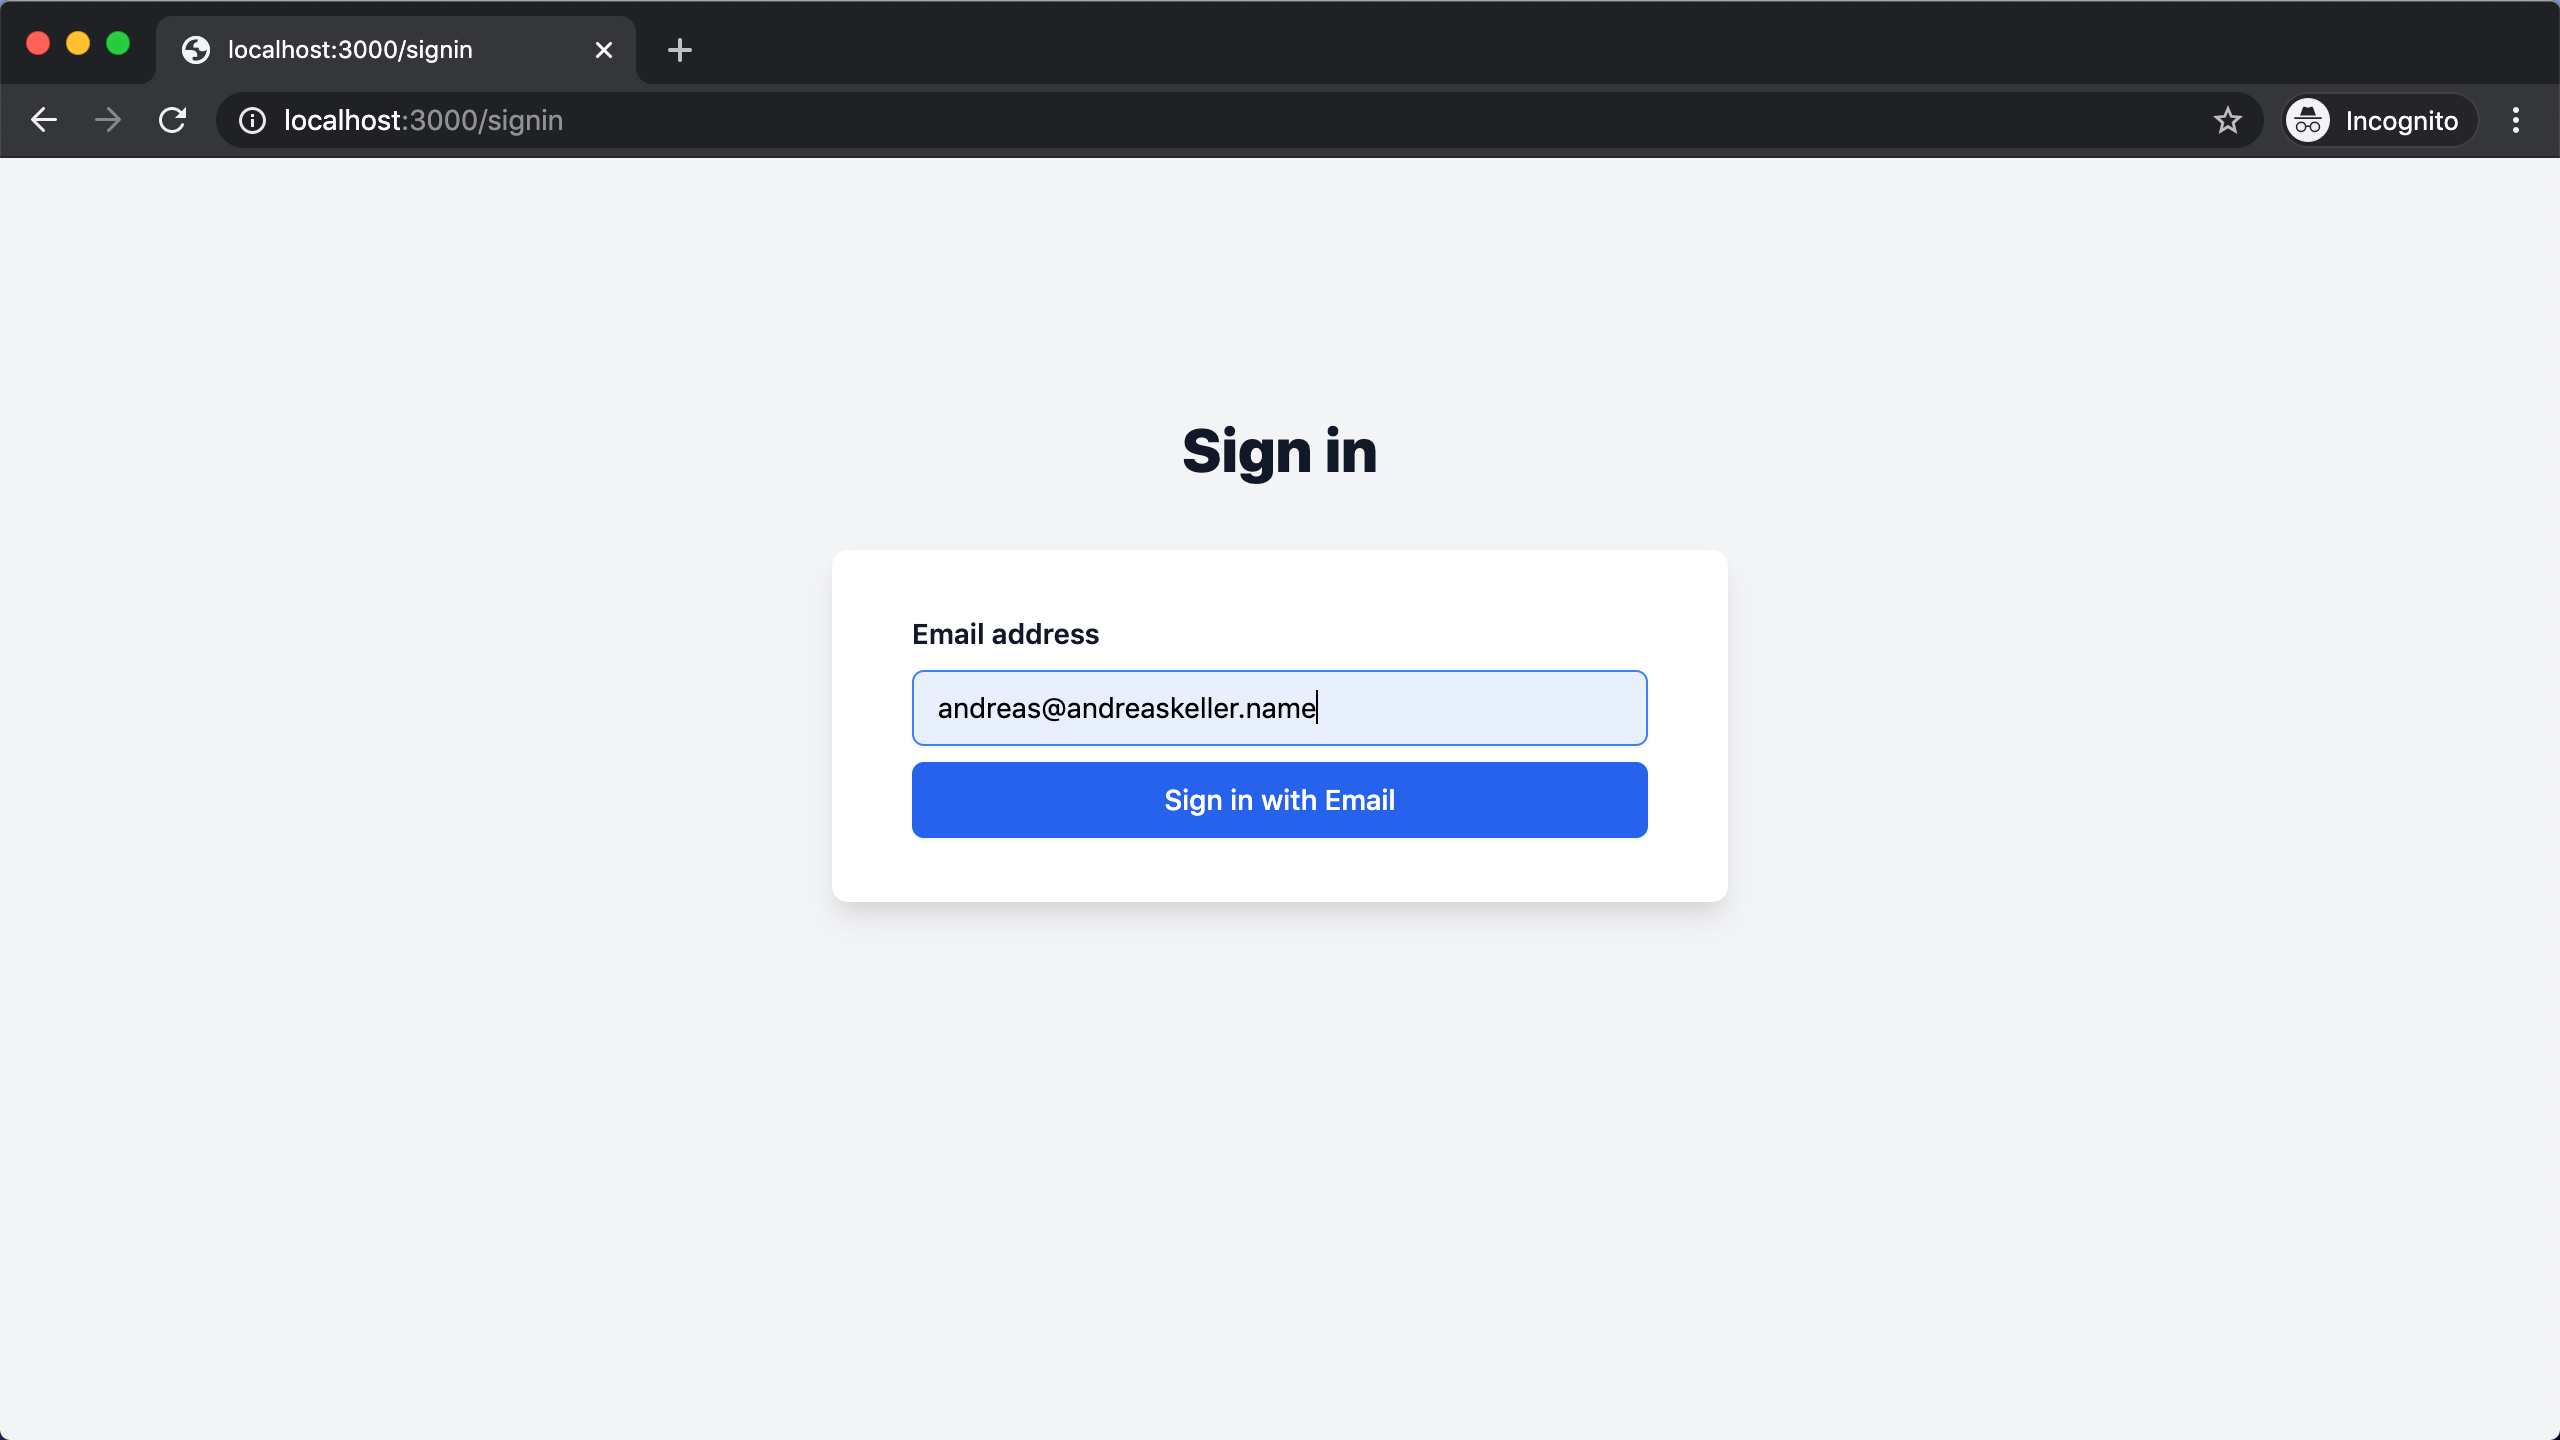
Sign in page
If you create a custom sign in form, you will need to submit both the email address and csrfToken from /api/auth/csrf in a POST request to /api/auth/signin/email.
import { csrfToken } from "next-auth/client";

export default function SignIn({ csrfToken }) {
  return (
    <div className="h-screen bg-gray-100 flex flex-col">
      <div className="mt-8 mx-4 sm:mx-auto sm:w-full sm:max-w-md">
        <div className="text-center mt-24">
          <h2 className="mt-6 text-center text-3xl font-extrabold text-gray-900">
            Sign in
          </h2>
        </div>
        <div className="mt-8 bg-white py-8 px-4 shadow-lg rounded-lg sm:px-10">
          <form method="post" action="/api/auth/signin/email">
            <input name="csrfToken" type="hidden" defaultValue={csrfToken} />
            <label className="block font-semibold text-sm text-gray-900">
              Email address
              <input
                className="mt-2 appearance-none block w-full px-3 py-2 border border-gray-300 rounded-md shadow-sm placeholder-gray-400 focus:outline-none focus:ring-blue-500 focus:border-blue-500 sm:text-sm"
                type="text"
                id="email"
                name="email"
                placeholder="you@company.com"
              />
            </label>
            <button
              className="mt-2 w-full flex justify-center py-2 px-4 border border-transparent rounded-md shadow-sm text-sm font-medium text-white bg-blue-600 hover:bg-blue-700 focus:outline-none focus:ring-2 focus:ring-offset-2 focus:ring-blue-500"
              type="submit"
            >
              Sign in with Email
            </button>
          </form>
        </div>
      </div>
    </div>
  );
}

export async function getServerSideProps(context) {
  return {
    props: {
      csrfToken: await csrfToken(context),
    },
  };
}
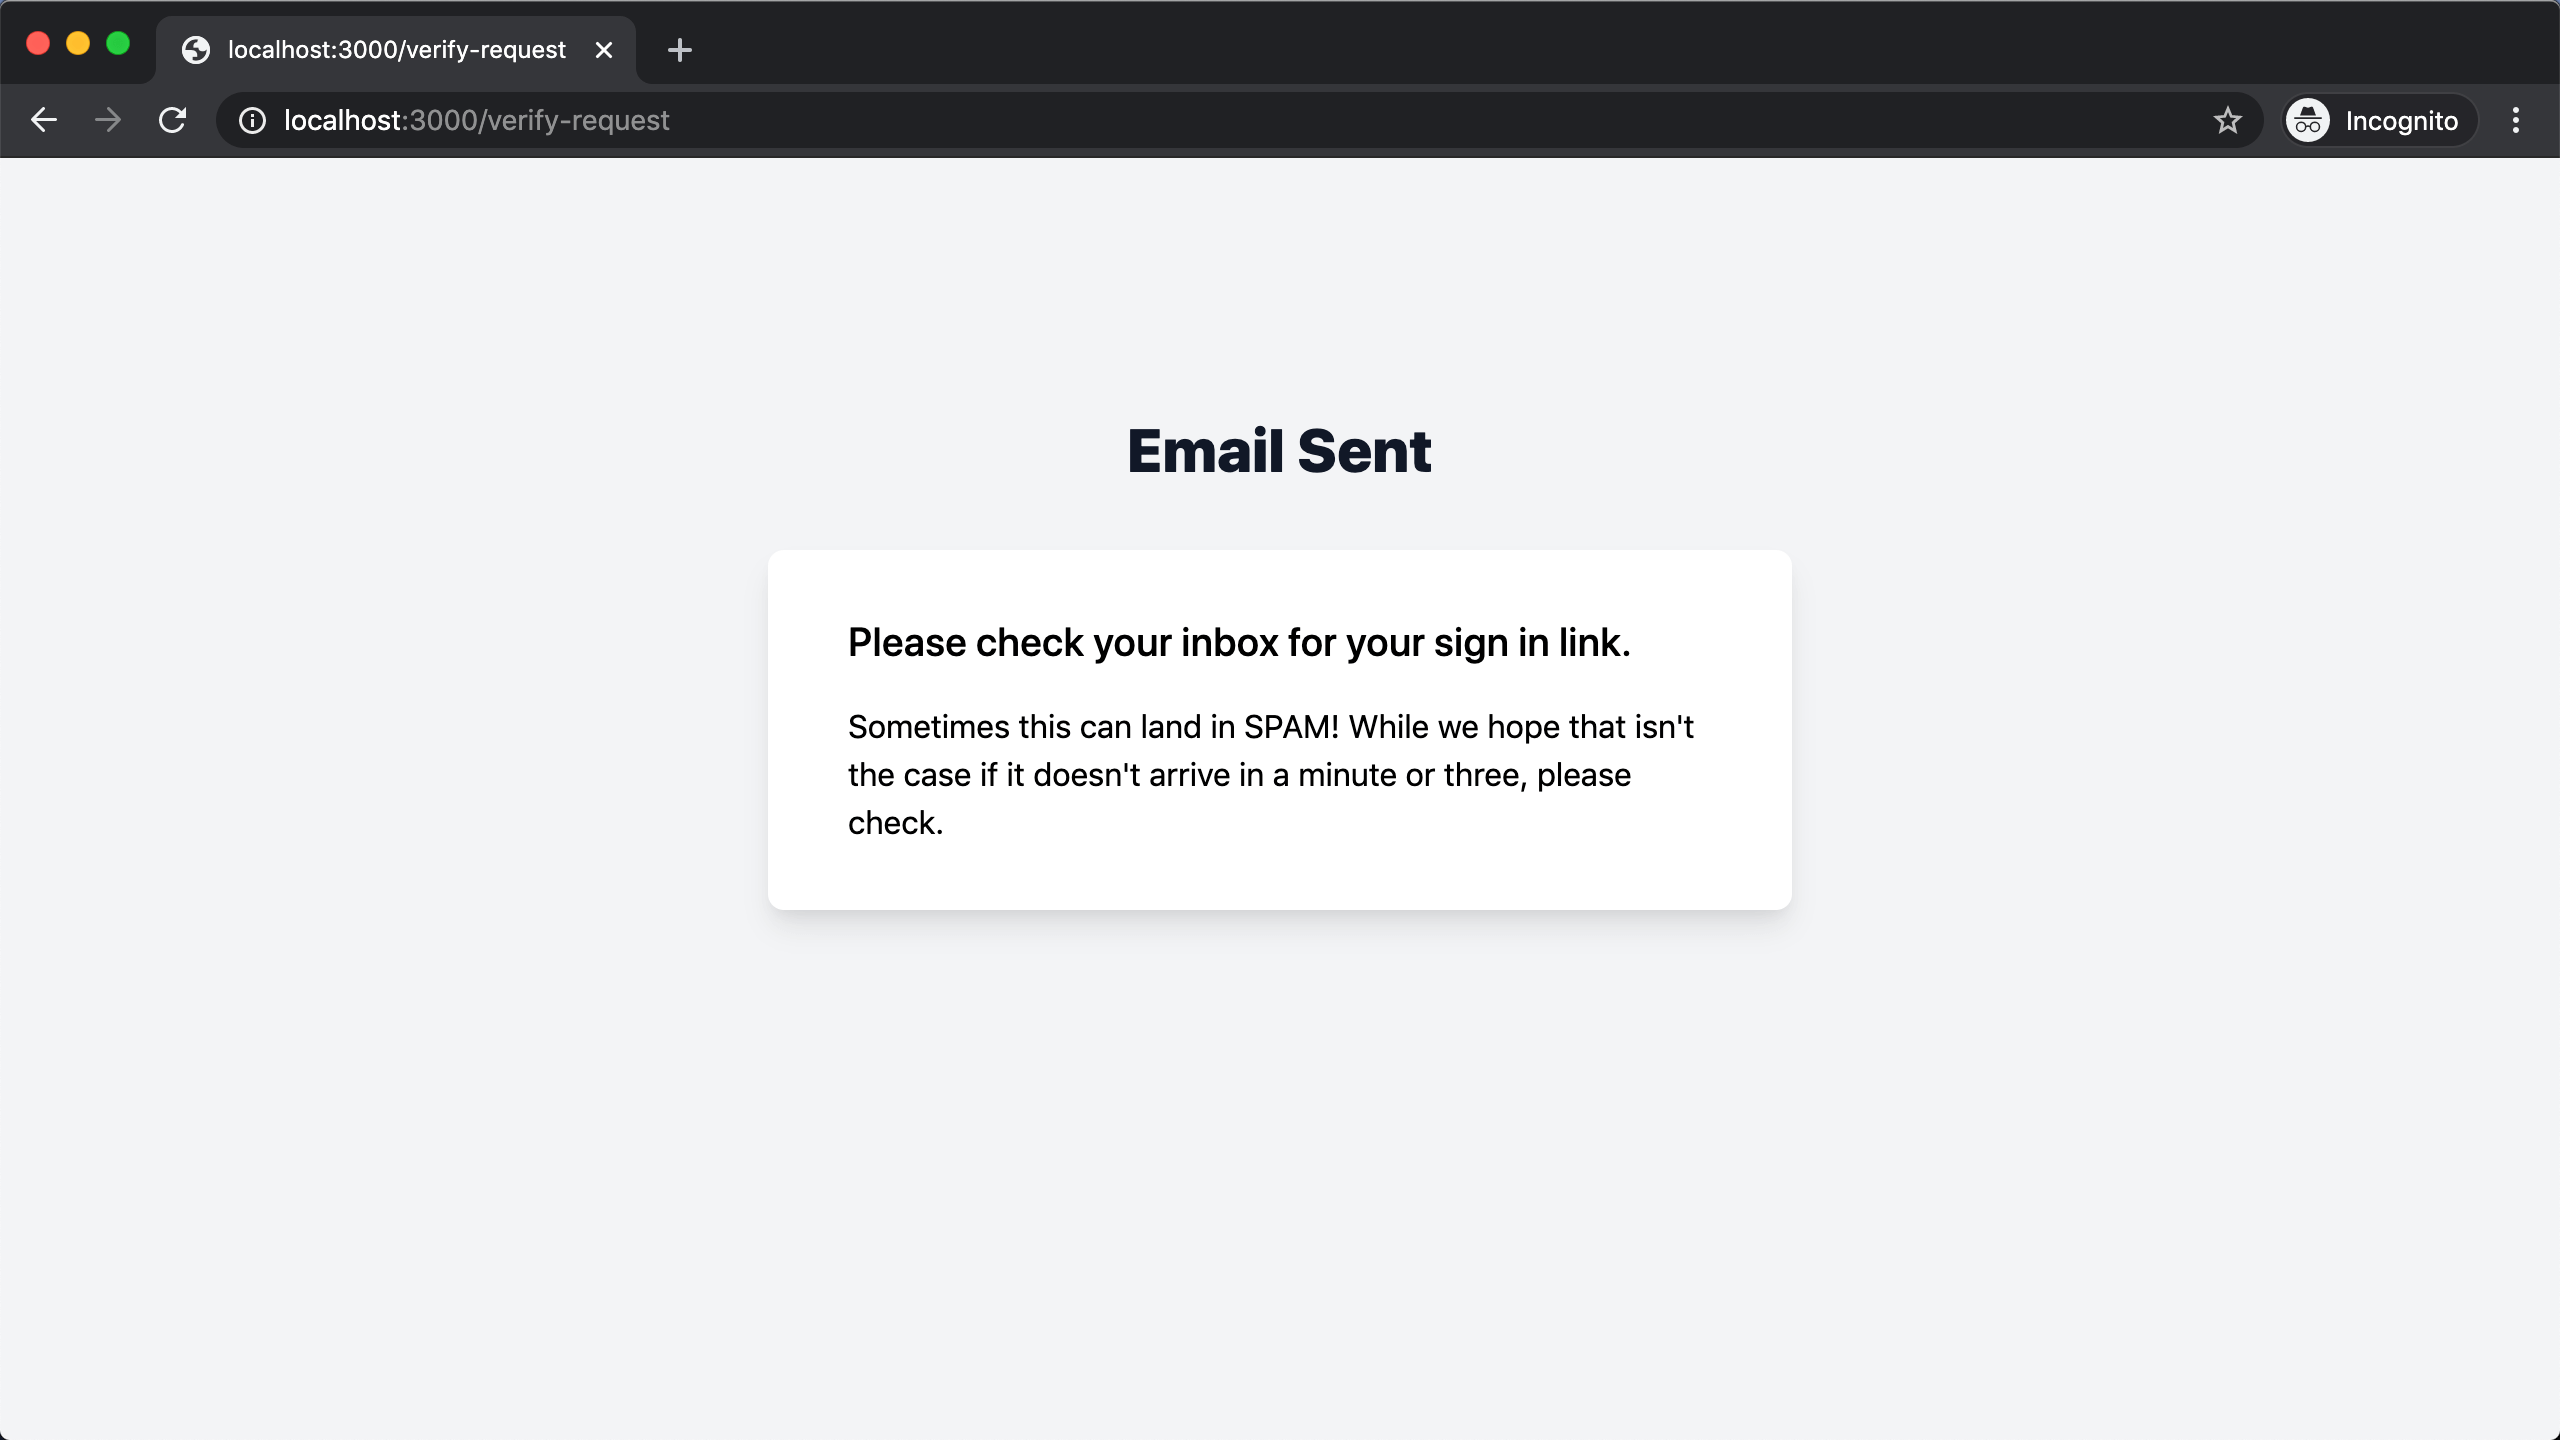
Email sent page
Similarly we can customize the confirmation page after the email has been sent.
...
  pages: {
    signIn: "/signin",
    verifyRequest: "/verify-request",
  }
...
export default function VerifyRequest() {
  return (
    <div className="h-screen bg-gray-100 flex flex-col">
      <div className="mt-8 mx-4 sm:mx-auto sm:w-full sm:max-w-lg">
        <div className="text-center mt-24">
          <h2 className="mt-6 text-center text-3xl font-extrabold text-gray-900">
            Email Sent
          </h2>
        </div>
        <div className="mt-8 bg-white py-8 px-4 shadow-lg rounded-lg sm:px-10">
          <p className="font-medium mb-4 text-xl">
            Please check your inbox for your sign in link.
          </p>
          Sometimes this can land in SPAM! While we hope that isn't the case if
          it doesn't arrive in a minute or three, please check.
        </div>
      </div>
    </div>
  );
}
Summary
We have now successfully added passwordless email authentication to our Next.js app with NextAuth.js and customized our sign in and email sent pages.
You could further customize the sign in email or add additional properties to the user account like roles.
Follow along as I'm building yabby.page in public.